Poisson Image Editing - A Parallel Implementation

![]()
Jiayi Weng (jiayiwen), Zixu Chen (zixuc)
Poisson Image Editing is a technique that can fuse two images together without producing artifacts. Given a source image and its corresponding mask, as well as a coordination on the target image, the algorithm always yields amazing result.
This project aims to provide a fast poisson image editing algorithm (based on Jacobi Method) that can utilize multi-core CPU or GPU to handle a high-resolution image input.
Installation
Linux/macOS
# install cmake >= 3.4
# if you don't have sudo (like GHC), install cmake from source
# on macOS, type `brew install cmake`
$ pip install fpie

# or install from source
$ pip install .
Extensions
| Backend | EquSolver | GridSolver | Documentation | Dependency for installation |
|---|---|---|---|---|
| NumPy |
|
|
docs | pip install numpy |
| Numba |
|
|
docs | pip install numba |
| GCC |
|
|
docs | cmake, gcc |
| OpenMP |
|
|
docs | cmake, gcc (on macOS you need to change clang to gcc-11) |
| CUDA |
|
|
docs | nvcc |
| MPI |
|
|
docs | pip install mpi4py and mpicc (on macOS: brew install open-mpi) |
| Taichi |
|
|
docs | pip install taichi |
After installation, you can use --check-backend option to verify:
$ fpie --check-backend
['numpy', 'numba', 'taichi-cpu', 'taichi-gpu', 'gcc', 'openmp', 'mpi', 'cuda']
The above output shows all extensions have successfully installed.
Usage
We have prepared the test suite to run:
$ cd tests && ./data.py
This script will download 8 tests from GitHub, and create 10 images for benchmarking (5 circle, 5 square). To run:
$ fpie -s test1_src.jpg -m test1_mask.jpg -t test1_tgt.jpg -o result1.jpg -h1 -150 -w1 -50 -n 5000 -g max
$ fpie -s test2_src.png -m test2_mask.png -t test2_tgt.png -o result2.jpg -h1 130 -w1 130 -n 5000 -g src
$ fpie -s test3_src.jpg -m test3_mask.jpg -t test3_tgt.jpg -o result3.jpg -h1 100 -w1 100 -n 5000 -g max
$ fpie -s test4_src.jpg -m test4_mask.jpg -t test4_tgt.jpg -o result4.jpg -h1 100 -w1 100 -n 5000 -g max
$ fpie -s test5_src.jpg -m test5_mask.png -t test5_tgt.jpg -o result5.jpg -h0 -70 -w0 0 -h1 50 -w1 0 -n 5000 -g max
$ fpie -s test6_src.png -m test6_mask.png -t test6_tgt.png -o result6.jpg -h1 50 -w1 0 -n 5000 -g max
$ fpie -s test7_src.jpg -t test7_tgt.jpg -o result7.jpg -h1 50 -w1 30 -n 5000 -g max
$ fpie -s test8_src.jpg -t test8_tgt.jpg -o result8.jpg -h1 90 -w1 90 -n 10000 -g max
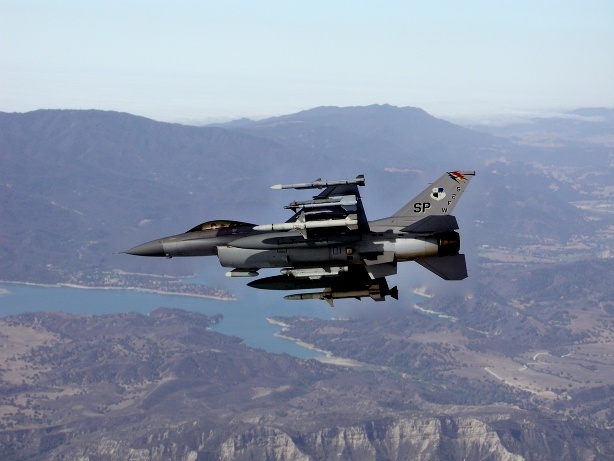
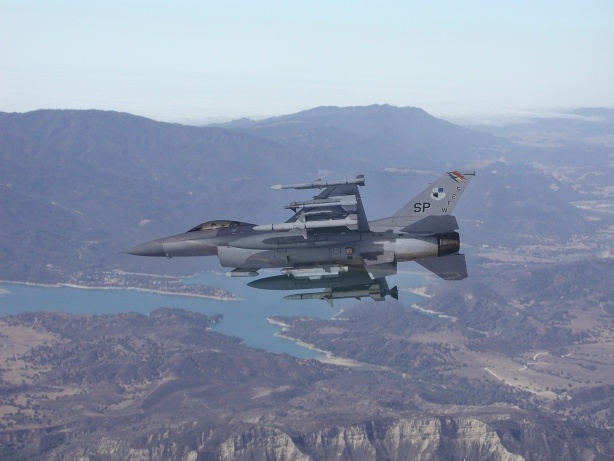
Here are the results:
| # | Source image | Mask image | Target image | Result image |
|---|---|---|---|---|
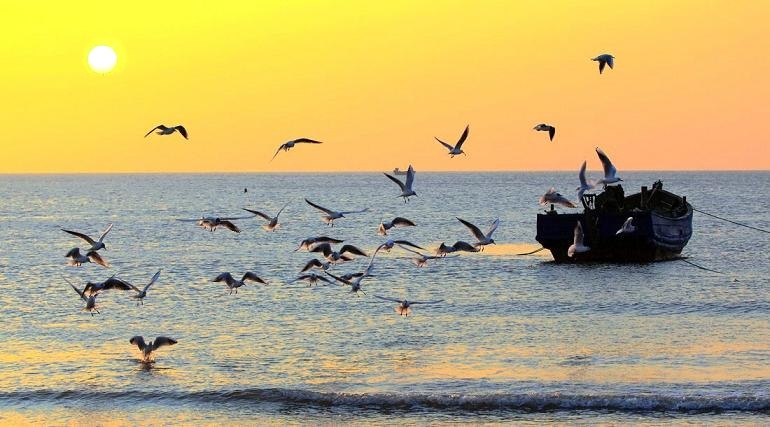
| 1 |  |
 |
 |
 |
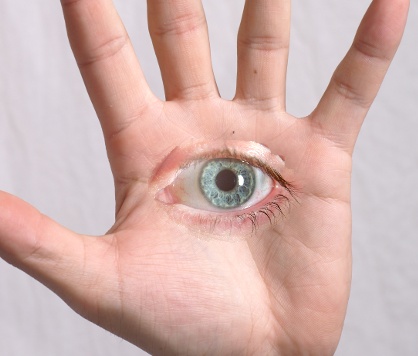
| 2 |  |
 |
 |
 |
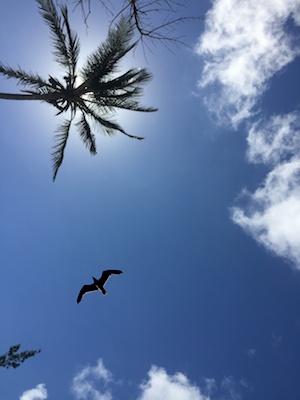
| 3 |  |
 |
 |
 |
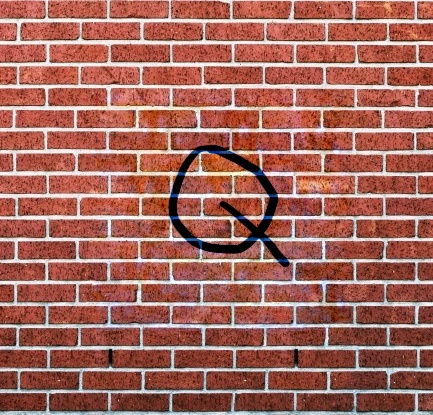
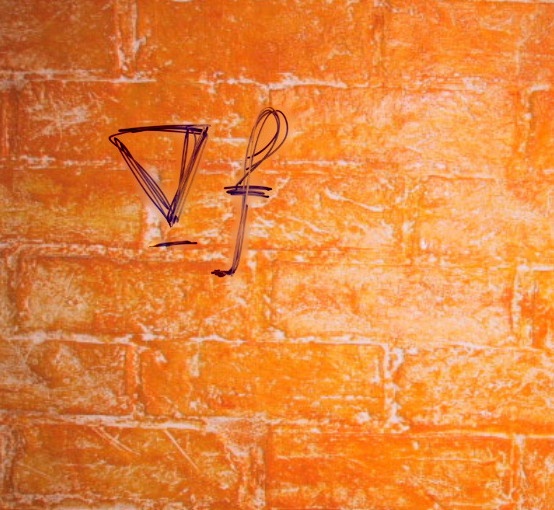
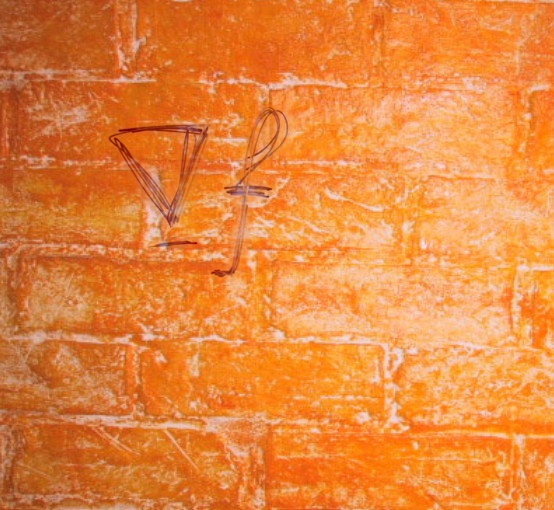
| 4 |  |
 |
 |
 |
| 5 |  |
 |
 |
 |
| 6 |  |
 |
 |
 |
| 7 |  |
/ |  |
 |
| 8 |  |
/ |  |
 |
GUI
$ fpie-gui -s test3_src.jpg -t test3_tgt.jpg -o result.jpg -b cuda -n 10000
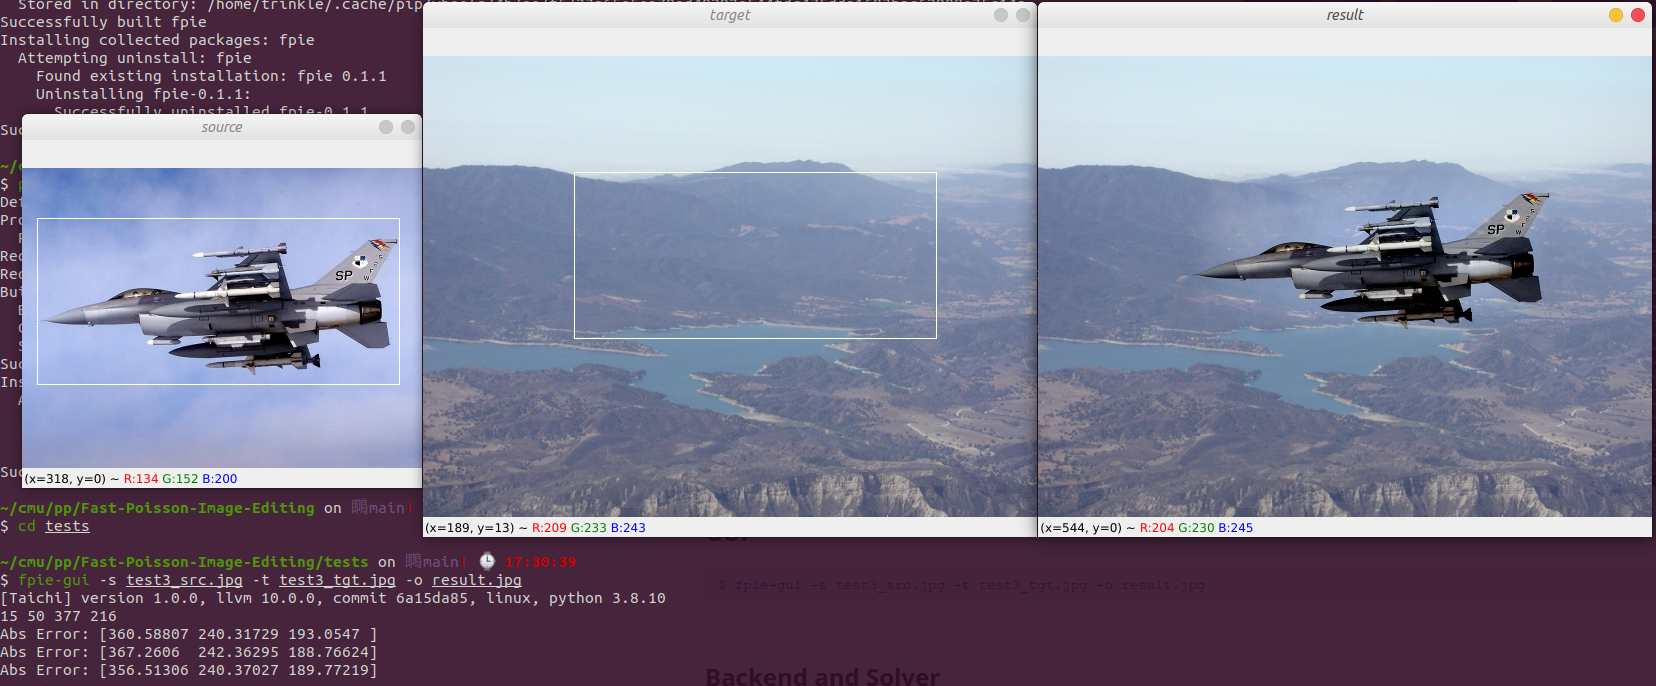
We provide a simple GUI for real-time seamless cloning. You need to use your mouse to draw a rectangle on top of the source image, and click a point in target image. After that the result will automatically be generated. In the end, you can press ESC to terminate the program.
Backend and Solver
We have provided 7 backends. Each backend has two solvers: EquSolver and GridSolver. You can find the difference between these two solvers in the next section.
For different backend usage, please check out the related documentation here.
For other usage, please run fpie -h or fpie-gui -h to see the hint.
Benchmark Result
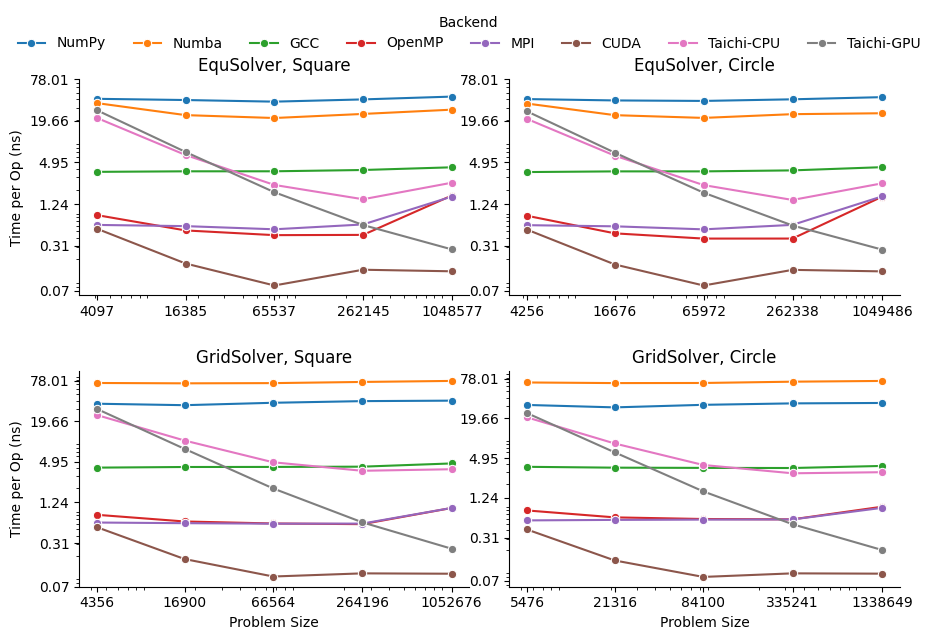
See benchmark result and report.
Algorithm Detail
The general idea is to keep most of gradient in source image, while matching the boundary of source image and target image pixels.
The gradient is computed by
After calculating the gradient in source image, the algorithm tries to solve the following problem: given the gradient and the boundary value, calculate the approximate solution that meets the requirement, i.e., to keep target image's gradient as similar as the source image. It can be formulated as , where
, N is the number of pixels in the mask, A is a giant sparse matrix because each line of A only contains at most 4 non-zero value (neighborhood), b is the gradient from source image, and x is the result value.
N is always a large number, i.e., greater than 50k, so the Gauss-Jordan Elimination cannot be directly applied here because of the high time complexity O(N^3). People use Jacobi Method to solve the problem. Thanks to the sparsity of matrix A, the overall time complexity is O(MN) where M is the number of iteration performed by poisson image editing.
This project parallelizes Jacobi method to speed up the computation. To our best knowledge, there's no public project on GitHub that implements poisson image editing with either OpenMP, or MPI, or CUDA. All of them can only handle a small size image workload.
EquSolver vs GridSolver
Usage: --method {equ,grid}
EquSolver directly constructs the equations by re-labeling the pixel, and use Jacobi method to get the solution via
.
GridSolver uses the same Jacobi iteration, however, it keeps the 2D structure of the original image instead of re-labeling the pixel in the mask. It may take some advantage when the mask region covers all of the image, because in this case GridSolver can save 4 read instructions by directly calculating the neighborhood's coordinate.
If the GridSolver's parameter is carefully tuned (--grid-x and --grid-y), it can always perform better than EquSolver with different backend configuration.
Gradient for PIE
Usage: -g {max,src,avg}
The PIE paper states some variant of gradient calculation such as Equ. 12: using the maximum gradient to perform "mixed seamless cloning". We also provide such an option in our program:
src: only use the gradient from source imageavg: use the average gradient of source image and target imagemax: use the max gradient of source and target image
The following example shows the difference between these three methods:
| # | target image | --gradient=src | --gradient=avg | --gradient=max |
|---|---|---|---|---|
| 3 | |
 |
 |
|
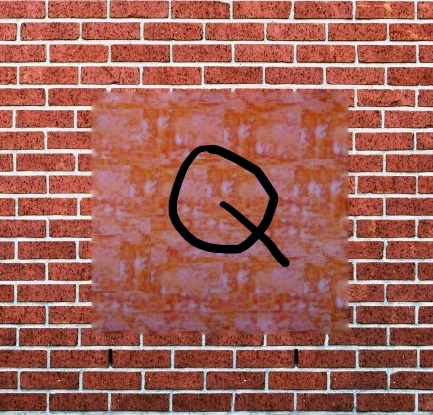
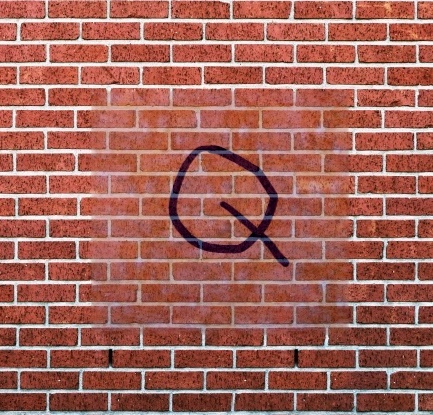
| 4 | |
 |
 |
|
| 8 | |
 |
 |
|
 19 Feb 28, 2022
 2 Oct 19, 2021
 2 Nov 15, 2021

 1.5k Jan 2, 2023

 371 Dec 30, 2022

 16 Dec 22, 2022

 2 Dec 12, 2022

 3 Jun 18, 2022


 418 Jan 07, 2023
 2 May 05, 2022
 2 Oct 07, 2022
 92 Dec 19, 2022
 213 Jan 02, 2023
 1.8k Dec 30, 2022
 4 Feb 15, 2022
 339 Dec 30, 2022
 3 Nov 15, 2021
 573 Jan 05, 2023
 6.5k Jan 01, 2023
 11 Nov 22, 2022
 258 Jan 02, 2023
 1.2k Jan 05, 2023
 11 Nov 14, 2022
 6 Aug 16, 2022
 26 Oct 18, 2022
 37 Dec 14, 2022
 8 Dec 27, 2022