Mercury
Share your Python notebooks with others
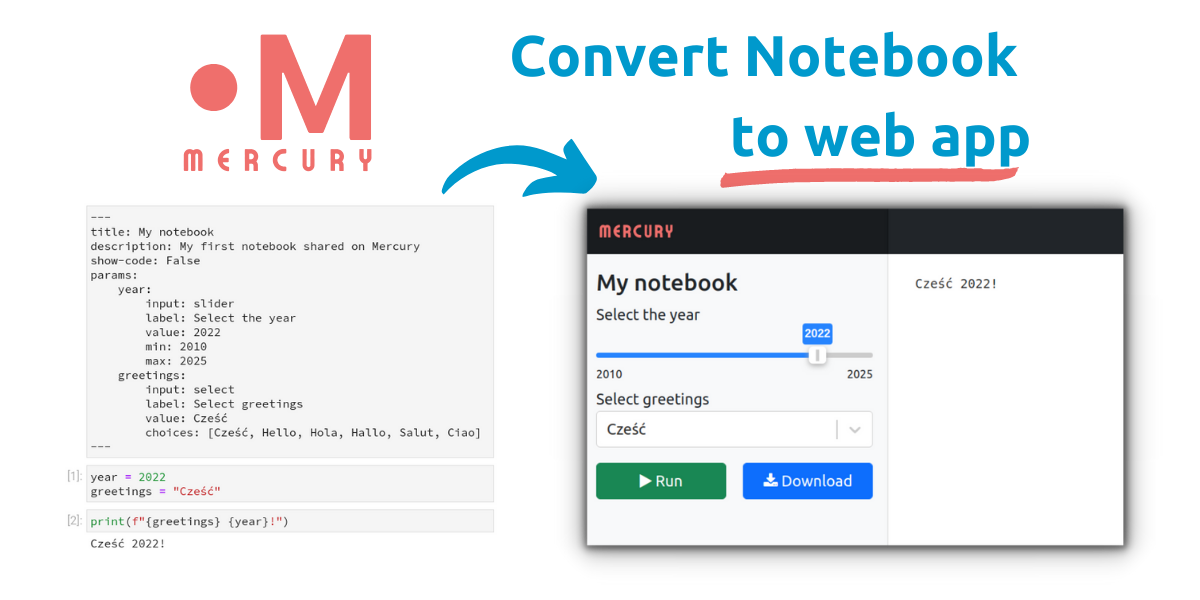
Easily convert your Python notebooks into interactive web apps by adding parameters in YAML.
- Simply add YAML with description of parameters needed in the notebook.
- Share notebook with others.
- Allow them to execute notebook with selected parameters.
- You can decide to show or hide your code.
- Easily deploy to the server.
Mercury is a perfect tool to share your Python notebooks with non-programmers.
- You can turn your notebook into web app. Sharing is as easy as sending them the URL to your server.
- You can add interactive input to your notebook by defining the YAML header. Your users can change the input and execute the notebook.
- You can hide your code to not scare your (non-coding) collaborators.
- Users can interact with notebook and save they results.
- You can share notebook as a web app with multiple users - they dont ovewrite original notebook.
Example
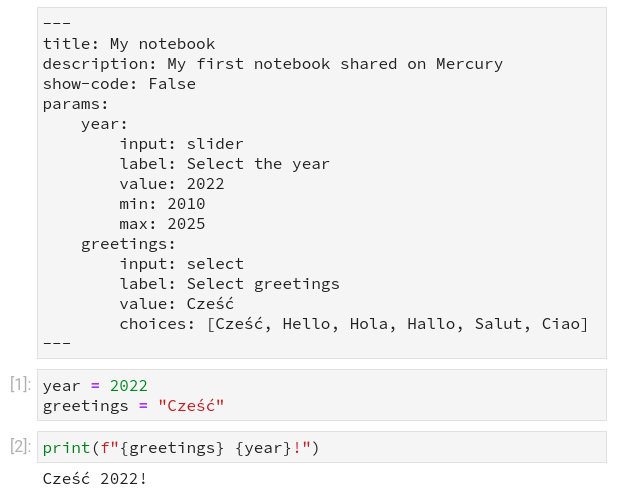
Notebook with YAML config
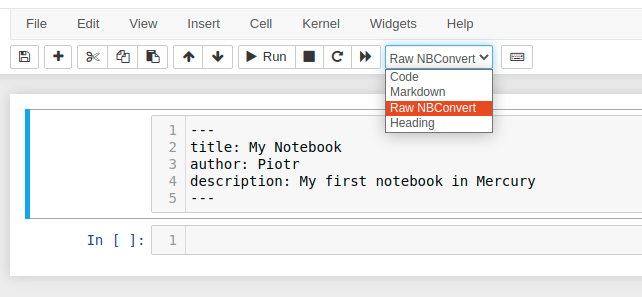
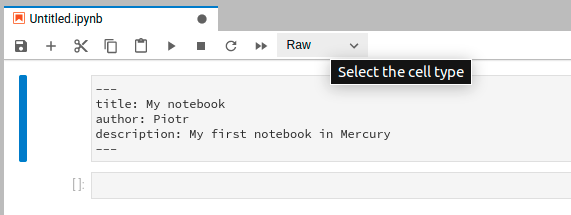
The YAML config is added as a first raw cell in the notebook.
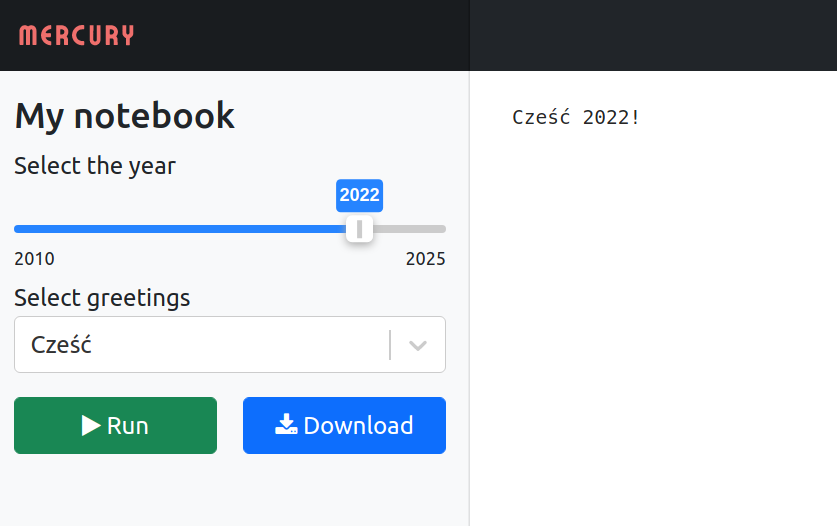
Web Application from Notebook
The web app generated from the notebook. Code is hidden (optional). User can change parameters, execute notebook with Run button, and save result with Download button.
Check our demo
The demo with several example notebooks is running at http://mercury.mljar.com (running on AWS EC2 t3a.small instance). No need to register.
The demo running at Heroku free dyno http://mercury-demo-1.herokuapp.com (with several notebooks-apps). No need to register. (if dyno is sleeping and notebooks are not loaded, please refresh it and wait a little)
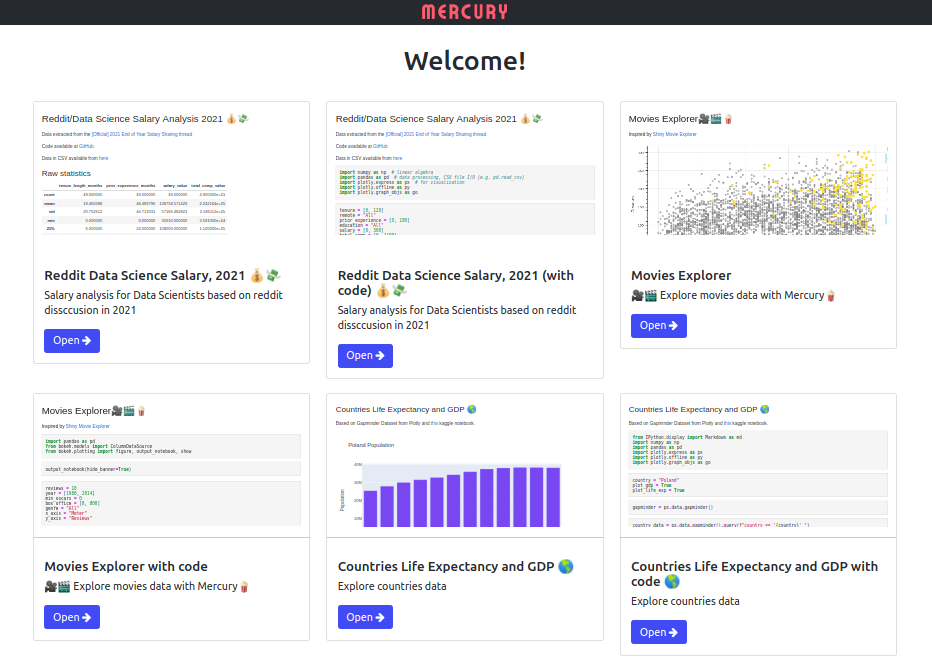
Share mutliple notebooks
You can share as many notebooks as you want. There is gallery with notebooks in the home view of the Mercury. You can select any notebook by clicking Open button.
Convert Notebook to web app with YAML
You need to add YAML at the beginning of the notebook to be able to run it as web application in the Mercury. The YAML configuration should be added in the notebook as Raw cell. It should start and end with a line containing "---". Below examples how it should look like in the Jupyter Notebook and Jupyter Lab:
Allowed parameters in YAML config:
title- string with a title of the notebook. It is used in the app side bar and in the gallery view.author- string with a author name (optional).description- string describing the content of the notebook. It is used in the gallery view.show-code- can beTrueorFalse. Default is set toTrue. It decides if the notebook's code will be displayed or not.show-prompt- can beTrueorFalse. Default is set toTrue. If set toTruethe prompt information will be displayed for each cell in the notebook.params- the parameters that will be used in the notebook. They will be displayed as interactive widgets in the side bar. Each parameter should have unique name that correspont to the variable name used in the code.
Define widget with YAML
Widget name is a variable name
Definition of the widget (in params) starts with the widget name. It will correspond to the variable in the code. The name should be a valid Python variable.
Widget input type
The next thing is to select the input type. It can be: slider, range, select, checkbox, numeric.
Widget label
For each input we need to define a label. It will be a text displayed above (or near) the widget.
Widget default value
You can set a default widget by setting the value. The format of the value depends on the input type:
- for
slideravalueshould be a number, example:value: 5, - for
rangeavalueshould be a list with two numbers, examplevalue: [3,6], - for
selectwithmutli: Falseavalueshould be a string, examplevalue: hey, - for
selectwithmulti: Trueavalueshould be a list of strings, examplevalue: [cześć, hi, hello], - for
checkboxavalueshould be a boolean (TrueorFalse), example:value: True, - for
numericavalueshould be a number, example:value: 10.2.
The rest of parameters depends on widget input type.
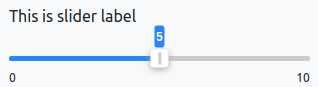
Slider
Additional parameters:
min- the minimum value for slider (default is set to 0),max- the maximum value for slider (default is set to 100).
Example YAML:
params:
    my_variable:
        input: slider
        label: This is slider label
        value: 5
        min: 0
        max: 10
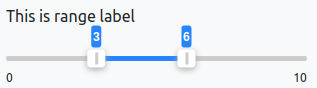
Range
Additional parameters:
min- the minimum value for slider (default is set to 0),max- the maximum value for slider (default is set to 100).
Example YAML:
params:
    range_variable:
        input: range
        label: This is range label
        value: [3,6]
        min: 0
        max: 10
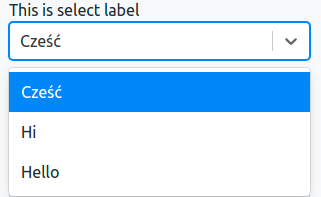
Select
Additional parameters:
multi- a boolean value that decides if user can select several options (default is set toFalse).choices- a list with available choices.
Example YAML:
params:
    select_variable:
        label: This is select label
        input: select
        value: Cześć
        choices: [Cześć, Hi, Hello]
        multi: False
Checkbox
There are no additional parameters.
Example YAML:
params:
    checkbox_variable:
        label: This is checkbox label
        input: checkbox
        value: True

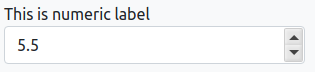
Numeric
Additional parameters:
min- a minimum allowed value (default set to 0),max- a maximum allowed value (default set to 100),step- a step value (default set to 1).
params:
    numeric_variable:
        label: This is numeric label
        input: numeric
        value: 5.5
        min: 0
        max: 10
        step: 0.1
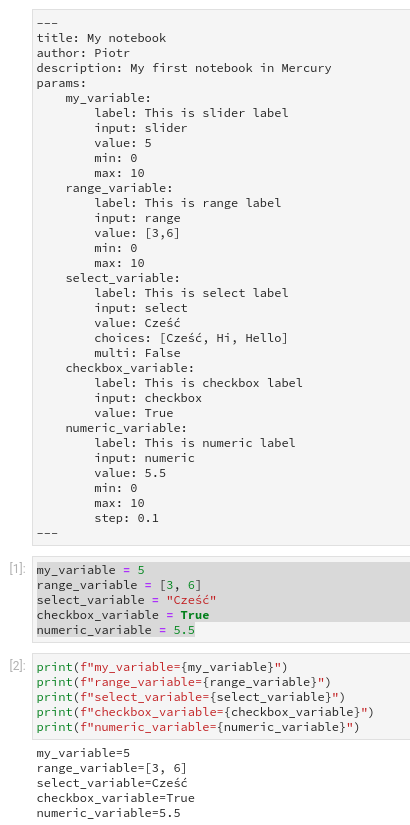
Full example YAML
---
title: My notebook
author: Piotr
description: My first notebook in Mercury
params:
    my_variable:
        label: This is slider label
        input: slider
        value: 5
        min: 0
        max: 10
    range_variable:
        label: This is range label
        input: range
        value: [3,6]
        min: 0
        max: 10
    select_variable:
        label: This is select label
        input: select
        value: Cześć
        choices: [Cześć, Hi, Hello]
        multi: False
    checkbox_variable:
        label: This is checkbox label
        input: checkbox
        value: True
    numeric_variable:
        label: This is numeric label
        input: numeric
        value: 5.5
        min: 0
        max: 10
        step: 0.1
---
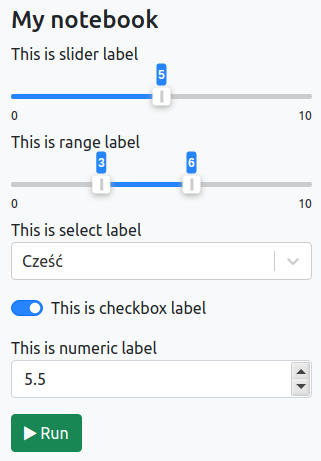
Widgets rendered from above YAML config:
Use variables in the code
To use variables in the code simply define the variable with the same name as widget name. You can also assign the same value as defined in YAML. Please define all variables in the one cell (it can be below the cell with YAML config).
When the user will interact with widgets and click the Run button, the code with variables will be updated with user selected values.
Example:
Installation
You can install Mercury directly from PyPi repository with pip command:
pip install mljar-mercury
Installation from GitHub:
pip install -q -U git+https://github.com/mljar/[email protected]
Running locally
To run Mercury locally just run:
mercury runserver --runworker
The above command will run server and worker. It will serve Mercury website at http://127.0.0.1:8000. It won't display any notebooks because we didn't add any. Please stop the Mercury server (and worker) for a moment with (Ctrl+C).
Execute the following command to add notebook to Mercury database:
mercury add <path_to_notebook>
Please start the Mercury server to see your apps (created from notebooks).
mercury runserver --runworker
Notebook development with automatic refresh
The Mercury watch command is perfect when you are creating a new notebook and would like to see how it will look like as web app with live changes.
Please run the following command:
mercury watch <path_to_your_notebook>
You can now open the web browser at http://127.0.0.1:8000 and find your notebook. When you change something in the notebook code, markdown or YAML configuration and save the notebook, then it will be automatically refreshed in the web browser. You can track your changes without manual refreshing of the web app.
Running in production
Running in production is easy. We provide several tutorials how it can be done.
- Deploy to Heroku using free dyno
- Deploy to AWS EC2 using t2.micro
- Deploy to Digital Ocean (comming soon)
- Deploy to GCP (comming soon)
- Deploy to Azure (comming soon)
Running with docker-compose
The docker-compose must be run from the Mercury main directory.
Please copy .env.example file and name it .env file. Please point the NOTEBOOKS_PATH to the directory with your notebooks. All notebooks from that path will be added to the Mercury before server start. If the requirements.txt file is available in NOTEBOOKS_PATH all packages from there will be installed.
Please remember to change the DJANGO_SUPERUSER_USERNAME and DJANGO_SUPERUSER_PASSWORD.
To generate new SECRET_KEY (recommended) you can use:
python -c 'from django.core.management.utils import get_random_secret_key; \
            print(get_random_secret_key())'
Please leave SERVE_STATIC=False because in the docker-compose configuration static files are served with nginx.
The docker-compose will automatically read environment variables from .env file. To start the Mercury please run:
docker-compose up --build
To run in detached mode (you can close the terminal) please run:
docker-compose up --build -d
To stop the containers:
docker-compose down
Mercury development
The Mercury consists of three elements:
- Frontend written in TypeScript with React+Redux
- Server written in Python with Django
- Worker written in Python with Celery
Each element needs a separate terminal during development.
Frontend
The user interface code is in the frontend directory. Run all commands from there. Install dependencies:
yarn install
Run frontend:
yarn start
The frontend is served at http://localhost:3000.
Server
The server code is in the mercury directory. Run all commands from there. Please set the virtual environment first:
virtualenv menv
source menv/bin/activate
pip install -r requirements.txt
Apply migrations:
python manage.py migrate
Run the server in development mode (DEBUG=True):
python manage.py runserver
The server is running at http://127.0.0.1:8000.
Worker
The worker code is in the mercury directory (in the apps/notebooks/tasks.py and apps/tasks/tasks.py files). Please activate first the virtual environment (it is using the same virtual environment as server):
source menv/bin/activate
Run the worker:
celery -A server worker --loglevel=info -P gevent --concurrency 1 -E
Mercury Pro
Looking for dedicated support, commercial friendly license and more features? The Mercury Pro is for you. Please see the details at our website.
![]()


 (example/to...??)


 318 Dec 31, 2022
 616 Dec 21, 2022
 19 Dec 13, 2022
 2 Mar 22, 2022
 1 Jun 07, 2022
 1k Jan 09, 2023
 294 Jan 01, 2023
 73 Oct 17, 2022
 314 Dec 19, 2022
 16 Jan 08, 2023
 1.1k Dec 25, 2022
 182 Dec 19, 2022
 514 Nov 17, 2022
 2 Apr 14, 2022
 70 Nov 16, 2022
 71 Dec 22, 2022
 2 Nov 21, 2021
 18 Sep 23, 2022
 1 Oct 27, 2021
 8 Jun 10, 2022