当前位置:网站首页>Opencv programming: opencv3 X trains its own classifier
Opencv programming: opencv3 X trains its own classifier
2022-07-19 10:49:00 【InfoQ】
One 、 Introduction to the environment
Two 、 Download and install OpenCV


3、 ... and 、 test OpenCV Its own classifier
3.1 Introduction to the built-in classifier file

3.2 QT Example code for
#include "widget.h"
#include "ui_widget.h"
Widget::Widget(QWidget *parent)
: QWidget(parent)
, ui(new Ui::Widget)
{
ui->setupUi(this);
dir="C:/";
ui->label_source->setAlignment(Qt::AlignVCenter);
ui->label_2->setAlignment(Qt::AlignVCenter);
}
Widget::~Widget()
{
delete ui;
}
QImage Widget::Mat2QImage(const Mat& mat)
{
// 8-bits unsigned, NO. OF CHANNELS = 1
if(mat.type() == CV_8UC1)
{
QImage image(mat.cols, mat.rows, QImage::Format_Indexed8);
// Set the color table (used to translate colour indexes to qRgb values)
image.setColorCount(256);
for(int i = 0; i < 256; i++)
{
image.setColor(i, qRgb(i, i, i));
}
// Copy input Mat
uchar *pSrc = mat.data;
for(int row = 0; row < mat.rows; row ++)
{
uchar *pDest = image.scanLine(row);
memcpy(pDest, pSrc, mat.cols);
pSrc += mat.step;
}
return image;
}
// 8-bits unsigned, NO. OF CHANNELS = 3
else if(mat.type() == CV_8UC3)
{
// Copy input Mat
const uchar *pSrc = (const uchar*)mat.data;
// Create QImage with same dimensions as input Mat
QImage image(pSrc, mat.cols, mat.rows, mat.step, QImage::Format_RGB888);
return image.rgbSwapped();
}
else if(mat.type() == CV_8UC4)
{
// Copy input Mat
const uchar *pSrc = (const uchar*)mat.data;
// Create QImage with same dimensions as input Mat
QImage image(pSrc, mat.cols, mat.rows, mat.step, QImage::Format_ARGB32);
return image.copy();
}
else
{
return QImage();
}
}
// Open local picture
void Widget::on_pushButton_open_clicked()
{
filename=QFileDialog::getOpenFileName(this," Select the open file ",dir,tr("*.bmp *.jpg *.png"));
if(filename.isEmpty())return;
QFileInfo info(filename);
dir=info.path(); // Save the current path
}
// Face detection code
void Widget::opencv_face(QImage qImage)
{
QTime time;
time.start();
// Define cascading classifiers
CascadeClassifier face_cascade;
// Load classification file
//
if( !face_cascade.load("C:/OpenCV_3.4.7/OpenCV-MinGW-Build-OpenCV-3.4.7/etc/haarcascades/haarcascade_frontalcatface.xml") )
{
qDebug()<<"haarcascade_frontalface_alt.xml Classifier loading error ";
return;
}
Mat frame=QImage2cvMat(qImage);
cvtColor( frame, frame, COLOR_BGR2GRAY );// Convert the image to grayscale
std::vector<Rect> faces;
// Face detection
face_cascade.detectMultiScale(frame,faces);
qDebug()<<tr(" Time consuming :%1 ms distinguish :%2 Number :%3\n").arg(time.elapsed()).arg(faces.size()).arg(faces.size());
for ( size_t i = 0; i < faces.size(); i++ )
{
#if 1
Point center(faces[i].x + faces[i].width/2, faces[i].y + faces[i].height/2);
ellipse(frame, center, Size( faces[i].width/2, faces[i].height/2 ), 0, 0, 360, Scalar( 255, 0, 255 ), 4 );
rectangle(frame,
cvPoint(cvRound(faces[i].x), cvRound(faces[i].y)),
cvPoint(cvRound((faces[i].x + faces[i].width-1)),
cvRound((faces[i].y + faces[i].height-1))),
Scalar(255, 255, 255), 3, 8, 0);
#endif
// Extract the recognition results
Mat frame1;
for(size_t i=0;i<faces.size();i++)
{
Point center(faces[i].x + faces[i].width / 2, faces[i].y + faces[i].height / 2);
frame1= frame(Rect(faces[i].x, faces[i].y, faces[i].width, faces[i].height));
}
/* Display the recognition result on the control */
ui->label_2->setPixmap(QPixmap::fromImage(Mat2QImage(frame1)));
}
/* Display... On the control */
QImage display_image=Mat2QImage(frame);
ui->label_source->setPixmap(QPixmap::fromImage(display_image));
}
Mat Widget::QImage2cvMat(QImage image)
{
Mat mat;
switch(image.format())
{
case QImage::Format_ARGB32:
case QImage::Format_RGB32:
case QImage::Format_ARGB32_Premultiplied:
mat = Mat(image.height(), image.width(), CV_8UC4, (void*)image.constBits(), image.bytesPerLine());
break;
case QImage::Format_RGB888:
mat = Mat(image.height(), image.width(), CV_8UC3, (void*)image.constBits(), image.bytesPerLine());
cvtColor(mat, mat, CV_BGR2RGB);
break;
case QImage::Format_Indexed8:
mat = Mat(image.height(), image.width(), CV_8UC1, (void*)image.constBits(), image.bytesPerLine());
break;
}
return mat;
}
void Widget::on_pushButton_start_clicked()
{
opencv_face(QImage(filename).scaled(ui->label_source->size(),Qt::KeepAspectRatio));
}
#ifndef WIDGET_H
#define WIDGET_H
#include <QWidget>
#include "opencv2/core/core.hpp"
#include "opencv2/core/core_c.h"
#include "opencv2/objdetect.hpp"
#include "opencv2/highgui.hpp"
#include "opencv2/imgproc.hpp"
#include <QFileDialog>
#include <QTime>
#include <QDebug>
using namespace cv;
QT_BEGIN_NAMESPACE
namespace Ui { class Widget; }
QT_END_NAMESPACE
class Widget : public QWidget
{
Q_OBJECT
public:
Widget(QWidget *parent = nullptr);
~Widget();
QImage Mat2QImage(const Mat& mat);
void opencv_face(QImage qImage);
Mat QImage2cvMat(QImage image);
QString dir;
QString filename;
private slots:
void on_pushButton_open_clicked();
void on_pushButton_start_clicked();
private:
Ui::Widget *ui;
};
#endif // WIDGET_H
QT += core gui

greaterThan(QT_MAJOR_VERSION, 4): QT += widgets

CONFIG += c++11

# The following define makes your compiler emit warnings if you use
# any Qt feature that has been marked deprecated (the exact warnings
# depend on your compiler). Please consult the documentation of the
# deprecated API in order to know how to port your code away from it.
DEFINES += QT_DEPRECATED_WARNINGS

# You can also make your code fail to compile if it uses deprecated APIs.
# In order to do so, uncomment the following line.
# You can also select to disable deprecated APIs only up to a certain version of Qt.
#DEFINES += QT_DISABLE_DEPRECATED_BEFORE=0x060000 # disables all the APIs deprecated before Qt 6.0.0

SOURCES += \
 main.cpp \
 widget.cpp

HEADERS += \
 widget.h

FORMS += \
 widget.ui

# Default rules for deployment.
qnx: target.path = /tmp/$${TARGET}/bin
else: unix:!android: target.path = /opt/$${TARGET}/bin
!isEmpty(target.path): INSTALLS += target

#linu Path setting of the platform
linux {
message(' function linu edition ')
# add to opencv The path to the header file , You need to modify it according to your own header file path
INCLUDEPATH+=/home/wbyq/work_pc/opencv-3.4.9/_install/install/include\
 /home/wbyq/work_pc/opencv-3.4.9/_install/install/include/opencv\
 /home/wbyq/work_pc/opencv-3.4.9/_install/install/include/opencv2

LIBS+=/home/wbyq/work_pc/opencv-3.4.9/_install/install/lib/libopencv_*
}

win32
{
 message(' function win32 edition ')
 # add to opencv The path to the header file , You need to modify it according to your own header file path
 INCLUDEPATH+=C:/OpenCV_3.4.7/OpenCV-MinGW-Build-OpenCV-3.4.7/include \
 C:/OpenCV_3.4.7/OpenCV-MinGW-Build-OpenCV-3.4.7/include/opencv \
 C:/OpenCV_3.4.7/OpenCV-MinGW-Build-OpenCV-3.4.7/include/opencv2
 LIBS+=C:/OpenCV_3.4.7/OpenCV-MinGW-Build-OpenCV-3.4.7/x86/mingw/bin/libopencv_*.dll
}

3.3 Test the effect of face classifier


3.4 Test the effect of cat face classifier

3.5 Test the effect of pedestrian detection classifier

Four 、 Train your classifier
4.1 Preface
4.1 Description of positive and negative sample materials for training
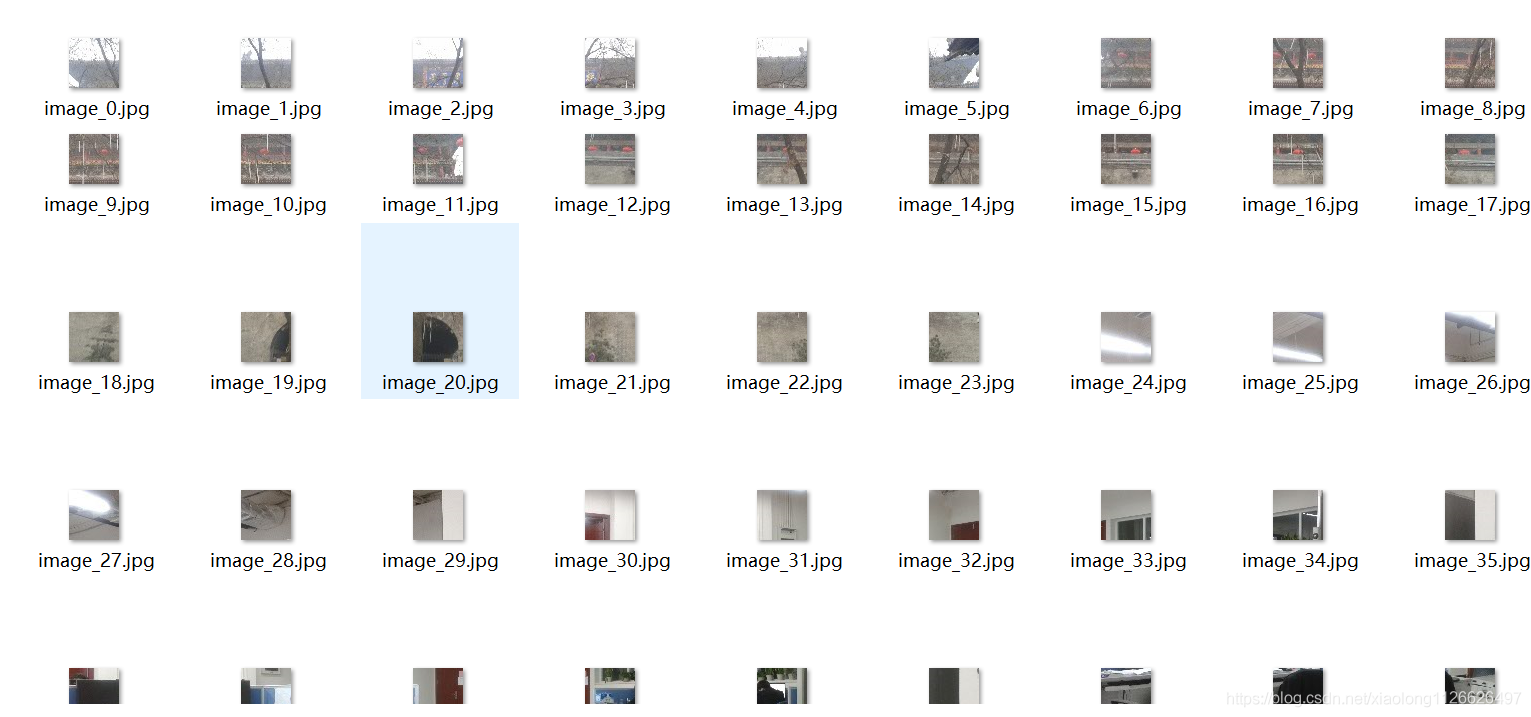
4.2 Positive sample image example

4.3 Negative sample image example
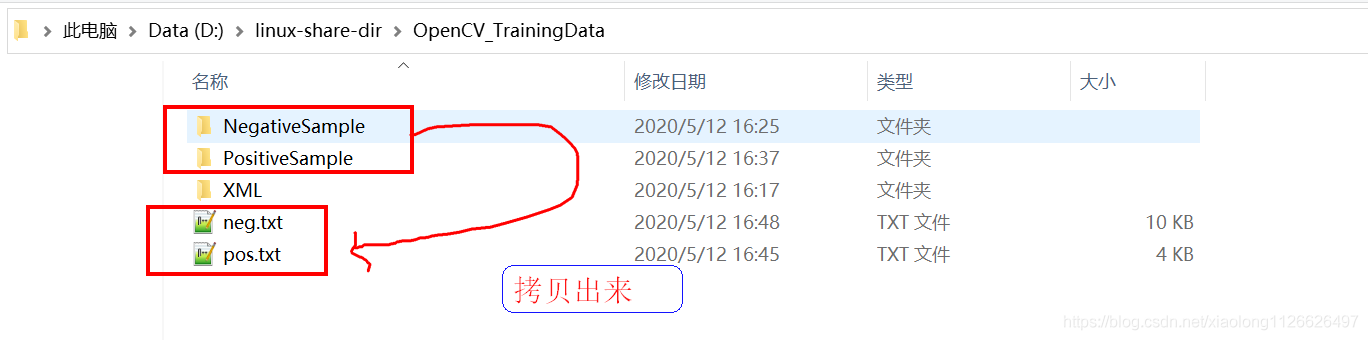
4.4 Create a working directory

3.2 Create a positive sample description file
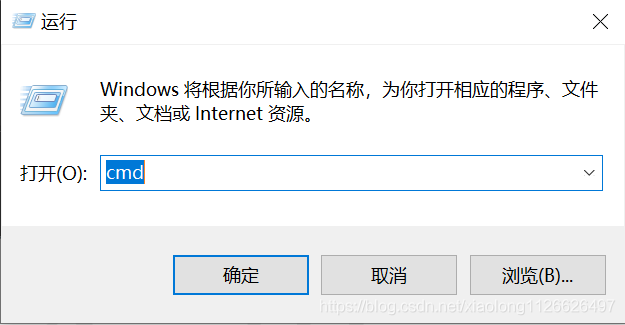

 command 1- Enter the positive sample directory :cd /d D:\linux-share-dir\OpenCV_TrainingData\PositiveSample

 command 2- Output the names and paths of all pictures in the directory to pos.txt file :dir /b/s/p/w *.jpg > pos.txt


3.3 Create a negative sample description file
 command 1:cd /d D:\linux-share-dir\OpenCV_TrainingData\NegativeSample

 command 2:dir /b/s/p/w *.jpg > neg.txt

3.4 Generate positive samples .vec file
 command 1:cd /d D:\linux-share-dir\OpenCV_TrainingData

 command 2:C:\OpenCV_3.4.7\opencv-vc-3.4.7\build\x64\vc15\bin\opencv_createsamples.exe -vec pos.vec -info pos.txt -num 54 -w 40 -h 40

3.5 Start training samples
 command 1:cd /d D:\linux-share-dir\OpenCV_TrainingData
 command 2:C:\OpenCV_3.4.7\opencv-vc-3.4.7\build\x64\vc15\bin\opencv_traincascade.exe -data XML -vec pos.vec -bg neg.txt -numPos 50 -numNeg 133 -numStages 20 -w 40 -h 40 -mode ALL

边栏推荐
猜你喜欢

Win10安装Apache Jena 3.17
Domestic flagship mobile phones have a serious price foam, and second-hand phones are more cost-effective than new ones, or buy iPhones

过拟合与欠拟合

LeetCode 2319. 判断矩阵是否是一个 X 矩阵

Aike AI frontier promotion (7.17)

分类任务中的类别不平衡问题

JSP based novel writing and creation website

Find balanced binary tree

ROS 重名

NAT技术及NAT ALG
随机推荐
Brush questions with binary tree (2)
Through middle order traversal and pre order traversal, the subsequent traversal will always build a binary tree
论文笔记:Mind the Gap An Experimental Evaluation of Imputation ofMissing Values Techniques in TimeSeries
unity3d中的旋转
Pytorch学习记录2 线性回归(Tensor,Variable)
How to use SVG to make text effects arranged along any path
SAP ABAP CDS view 视图的 Replacement 技术介绍
Connected graph (union search set)
Bidirectional NAT Technology
[PostgreSQL] PostgreSQL 15 optimizes distinct
内核态和用户态
Design and Simulation of intelligent storage cabinet control system
Take a look at this ugly face | MathWorks account unavailable - technical issue
6G全域融合网络展望
Scala在Idea中的配量
Data Lake solutions of various manufacturers
Detailed explanation of C language custom types
Design of the multi live architecture in different places of the king glory mall
AutoJs学习-多功能宝箱-中
vulnhub inclusiveness: 1